How To Print On Backlit Paper?
BACKLIT PAPER FOR LED WINDOW DISPLAYS
How To Print On Backlit Paper
2 in 1 Print on backlit paper:
Laser and Inkjet printers – Exclusive Product.
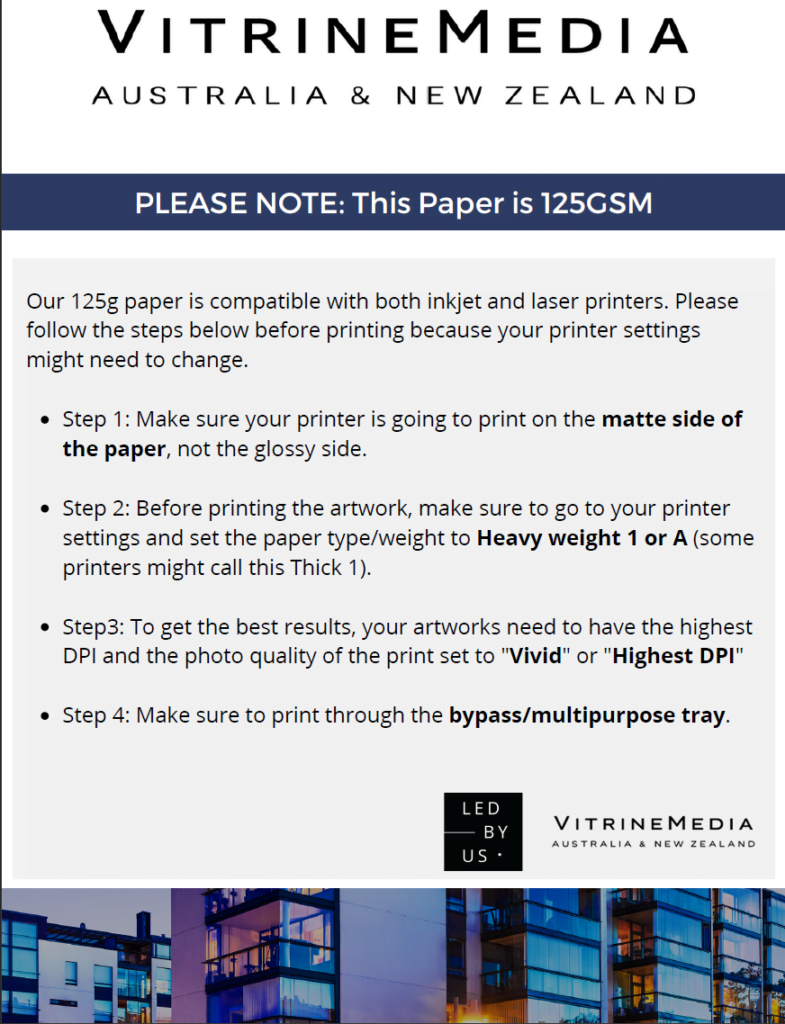
- laser printer: print on the matte side
- inkjet printer: print on the glossy side
For some printers, it is sometimes better to print one sheet at a time to avoid a printer jam. As well, printing one sheet at a time prevents printed sheets from sticking to each other.
Our backlit paper is available in two formats:
- A4 / 8.5 x 11 format
- A3 / 11 x 17 format
Make sure that your prints are COMPLETELY DRY before inserting them into your LED display to keep the ink from smudging. This paper is compatible with any laser and inkjet printer: Canon, LG, Dell, Minolta, HP, Epson, Sony, Samsung, Kodak, Panasonic, Brothers, Xerox, Ricoh, Lexmark, and IBM.
For double-sided displays, you have the option to insert a printed sheet in the back side as well. If you’ve noticed a “ghosting” or “honeycomb cell” effect when there are images on both sides on the display, you can minimize it by inserting a blank backlit sheet between the printed sheet and the display.
FAQ How To Print On Backilit Paper
If you have an ink jet printer, check that the weight of the Backlight is in fact 125g. Please note that an inkjet printer can either be a dye-type or a pigment-type. Beware, the mirror effect only works with dye ink cartridges.
If you print using a laser printer, ensure that the weight of the paper is 100g , 180g or the PREMIUM Paper. If the paper supplied with your panels is compatible with your printer, choose « thick mat paper » (or « transparent » for the 100g Backlight paper on a laser printer) and « high quality print » on your printer’s settings. In addition, you can tweak the luminosity and contrast settings on your printer to intensify the effects.
If the problem persists, contact your printer’s service provider. It is probable that a specific setting is required or that your printer is unfortunately not compatible with the Backlight paper.
This method is only to be used when printing from an ink jet printer on 125g Backlight paper.
There are different ways to inverse the image:
Your printer allows you to do so (contact the administrator).
Download the virtual PDF Creator printer and follow the steps:
1 Open your file
2 Click «Print» and choose «PDF Creator»
3 Click «Properties»
4 Click «Advanced»
5 Click the scroll down options in «PostScript options»
6 Select «Yes» under «Mirror Output»
7 Click «ok» and then «print» all while leaving the PDF Creator in the list of available printers
8 A new PDF file will be generated. Save it in your files then print it on the mat side of your
125g Backlight paper.
For your image files (jpeg/png/..) you can invert them using the Paint application (using the “rotate” option click on “rotate horizontaly”)
The print in made in mirror on the mat side, and the image is properly printed on the glossy side.
The ink of your machine is most likely pigment based, this does not allow you to print your visual on the back (mat) side of the paper.
Go to your printer’s settings and change the format of the paper (A4, A3) and the paper orientation
( portrait, landscape).
If you have a laser printer, you cannot delete this margins, but can be lessened (this option is often available in your printer’s settings). Contact your printer’s supplier to find out how to reduce the margins on the visuals.
If you have an ink jet printer, the « printing without borders » should be available in the settings. The older models may not have this option available.
Change the settings on the paper by setting the type of paper to «transparent» or «thick paper». Printers are usually set to accommodate standard 80g paper. You must therefore ensure to increase the paper weight on the settings (ex: 106g and over) and change the quality setting to «high definition/low printing speed».
In addition, multifunction laser printers feature a heating system (known as an oven) which allows the colored powder to adhere to the paper. To minimize negative effects of the heat on your print we highly recommend that your print using your printer’s bypass (manual insertion).
If you do not get the desired result even after all the changes in the settings, it can be possible that unfortunately the 100g Backlight paper and your printer are not compatible.
The white dots that can be visible through your visual is the honeycomb. This honeycomb patern allows the light to be diffused evenly throughout the display panel. We recommend that you insert a blank sheet of paper.
The display panels can be turned on or off when inserting your Backlight paper.
You simply need to position your finger on the top edge of the screen and to pull lightly on the front panel. If you pull too hard, the sheet will not slide in correctly into the display screen. You also run the risk of breaking the display panel.
If you have dual faced display panels, simply insert a blank sheet of standard paper into each side of the panel, behind your visual. You can also insert blackout paper in the panel facing the indoor of the space (behind your visual), this will increase the luminosity on the outside panel.
You must let your visuals dry after they have been printed. The time it takes to dry varies from 2 to 0 minutes (or more for the larger formats).
In case your display window in highly exposed to the sun or if your display panels are located near a heat or humidity source (in a display case outside or near a radiator), we highly recommend that you insert a transparent sheet (type of the paper used in a projector) between your visual and the front facing side of your panels. This will help you avoid staining your display panel (not covered by the guarantee).
The VitrineMedia Backlit Paper is dedicated to backlit LED Window displays
Make the most of your LED backlit displays with our high-quality backlit paper for professionals, specifically designed for use with any inkjet or laser/copier printers! VitrineMedia backlit paper is the product to use in your poster holders, illuminated menu holders, or any other LED display using backlighting.
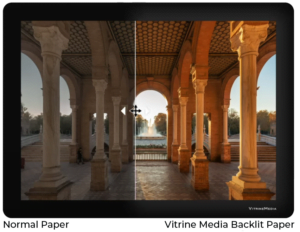 Backlight paper is a printing tool which allows light to diffuse. Also known as ‘back-lit paper’, it is placed in lit casings or LED display panels. Backlighting is a technique which allows you to add light behind your paper in order to improve its visual impact and the display contrast. This type of display method ensures proper visibility of all marketing or information messaging even in dimly lit or dark areas. It changes how your clients perceive your messaging and makes it more dynamic.
VitrineMedia Backlight paper is specifically designed to maximize the impact of your visuals in VitrineMedia’s LED display panels. It allows you to print your messaging with ease, and guarantees extraordinary results. Your display panels highlight your messaging and the Backlight paper intensifies their impact.
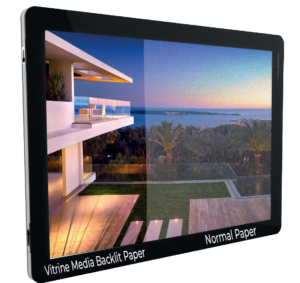
VitrineMedia does not recommend using other types of paper as they may give a spotty appearance to the visual, as you can see below.
Print on Backlit paper VitrineMedia Vs standard paper (80g and other types)
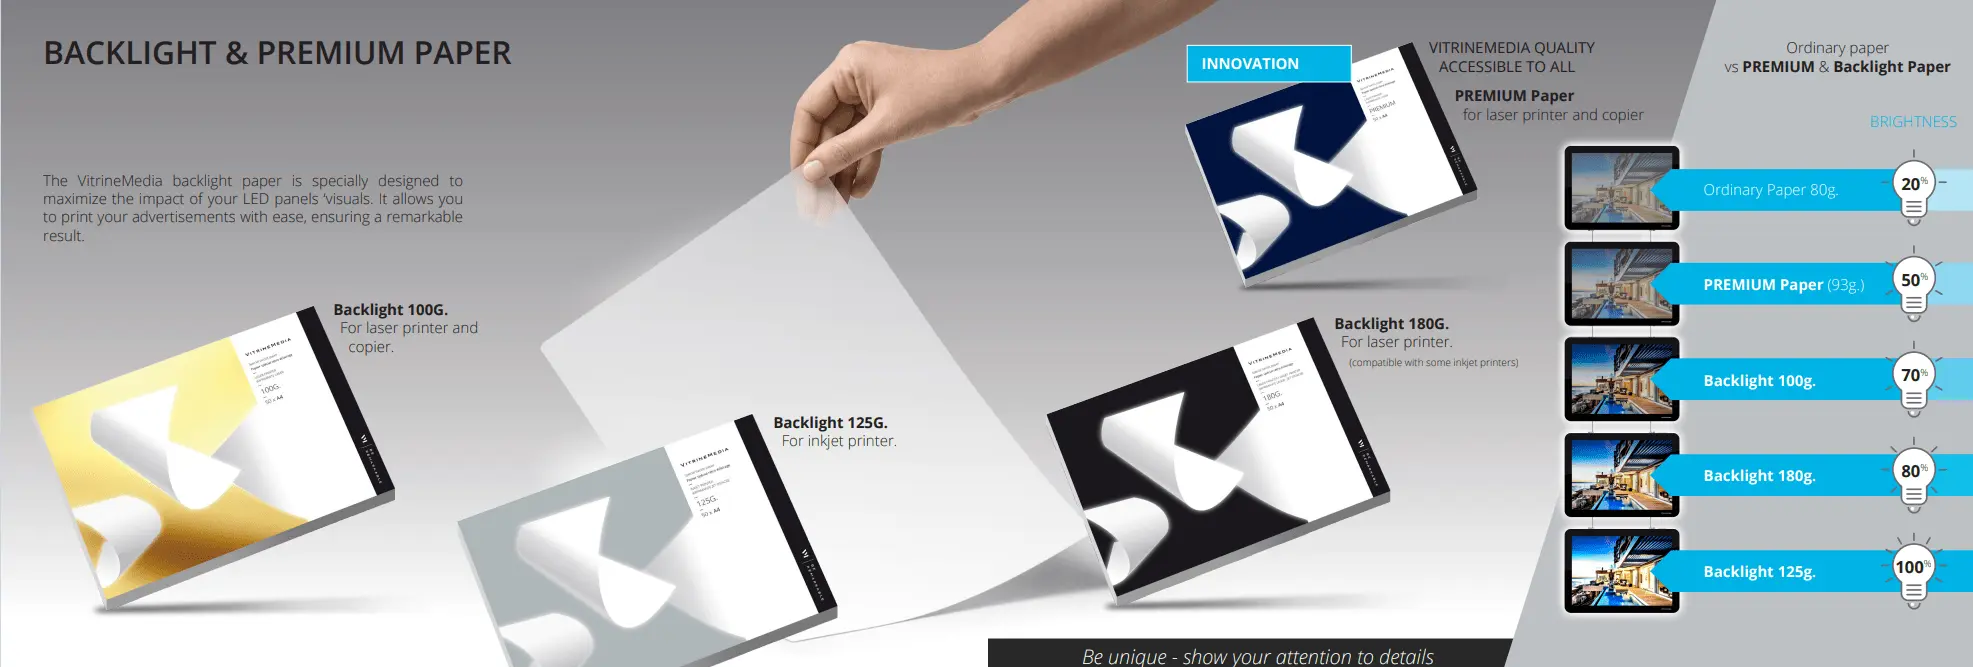
Features
- Translucent paper producing a brilliantly smooth appearance
- Thickness: 150 microns
- Photos and prints look brighter and bolder, creating stunning displays
- Our paper is designed for use with most desktop and inkjet printers
- Save money – no need to outsource your printing
- The VM Backlit Paper offers unique contrasts and colour rendering, enabling you to make your campaigns and your visuals shine


